Posts

A-10C Standby Compass - Sun Shade

Image
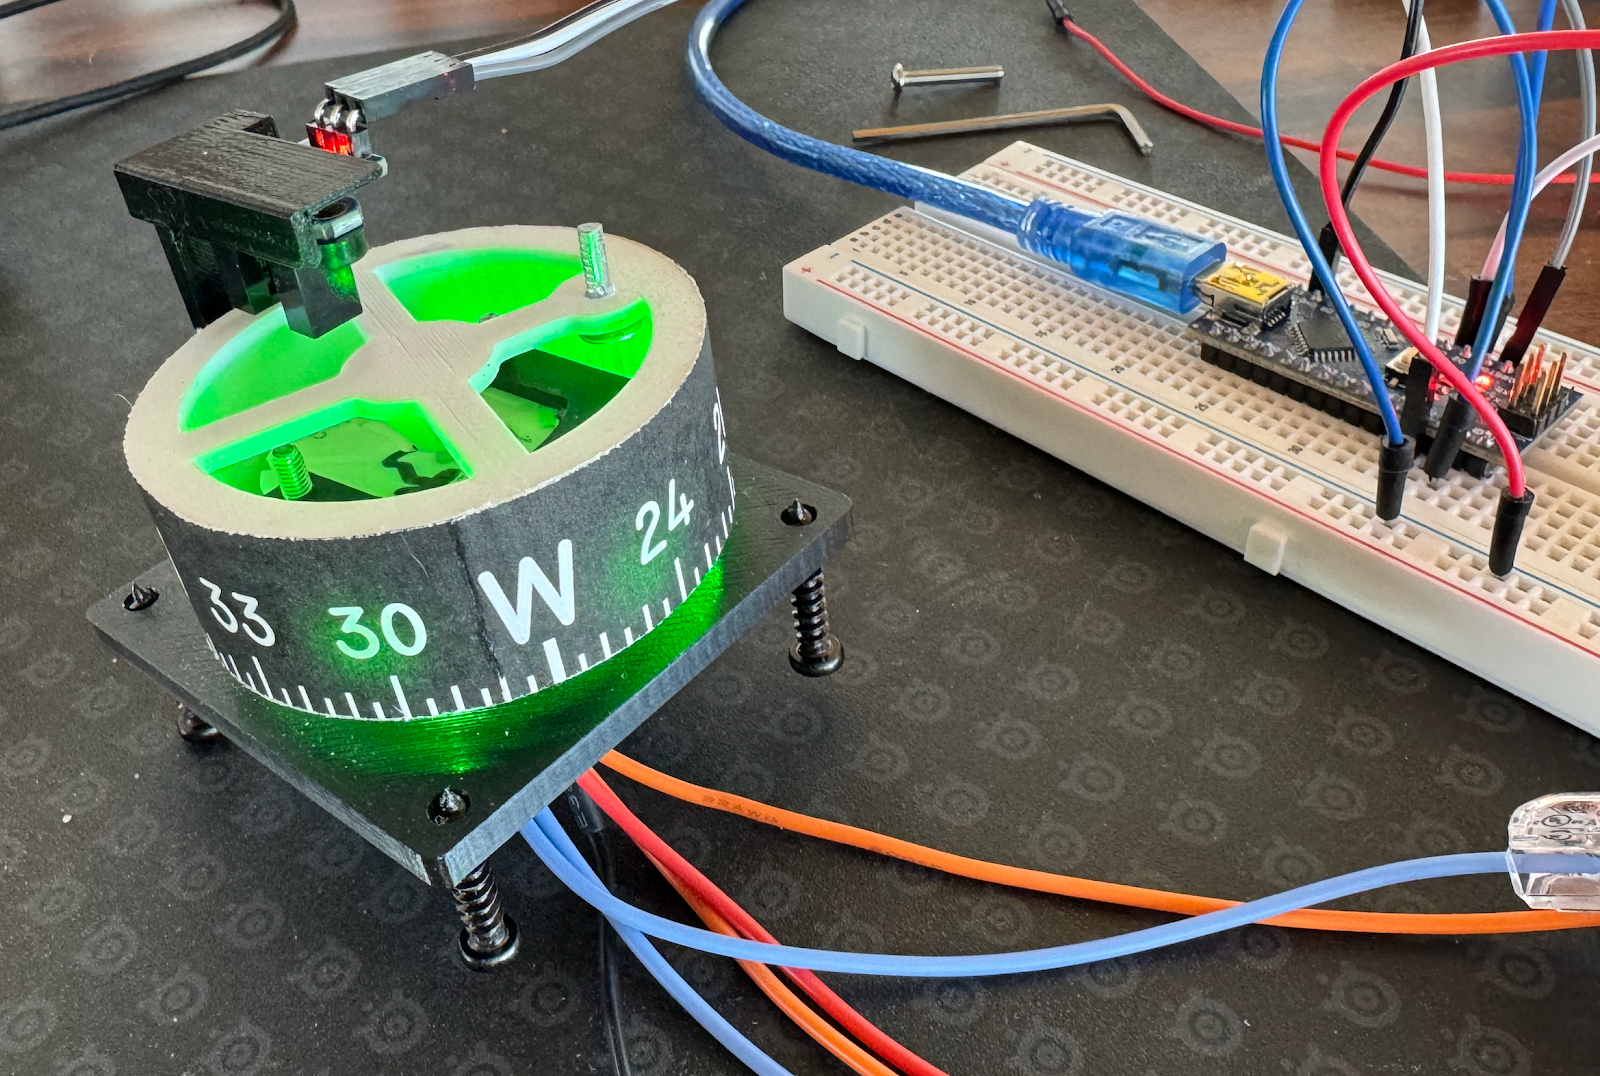
 One of the final items to add to this instrument build (besides the text covers for the lower LEDs) was the sun shade for the AR LED box.  I made this out of thin aluminum sheets , cutting it from a template using some metal sheers .    My template was created by tracing some of the actual artwork from the DCS sim, and then scaling it to the proper size. It turned out ok, not perfect but pretty good.  Primed and painted it and then installed it using 2 of the 4 holes that were already on the LED box 3D print.  I used some heat inserts in those holes to give the screws something to bite, but the holes are really too big for my inserts so had to use some glue to help out.  
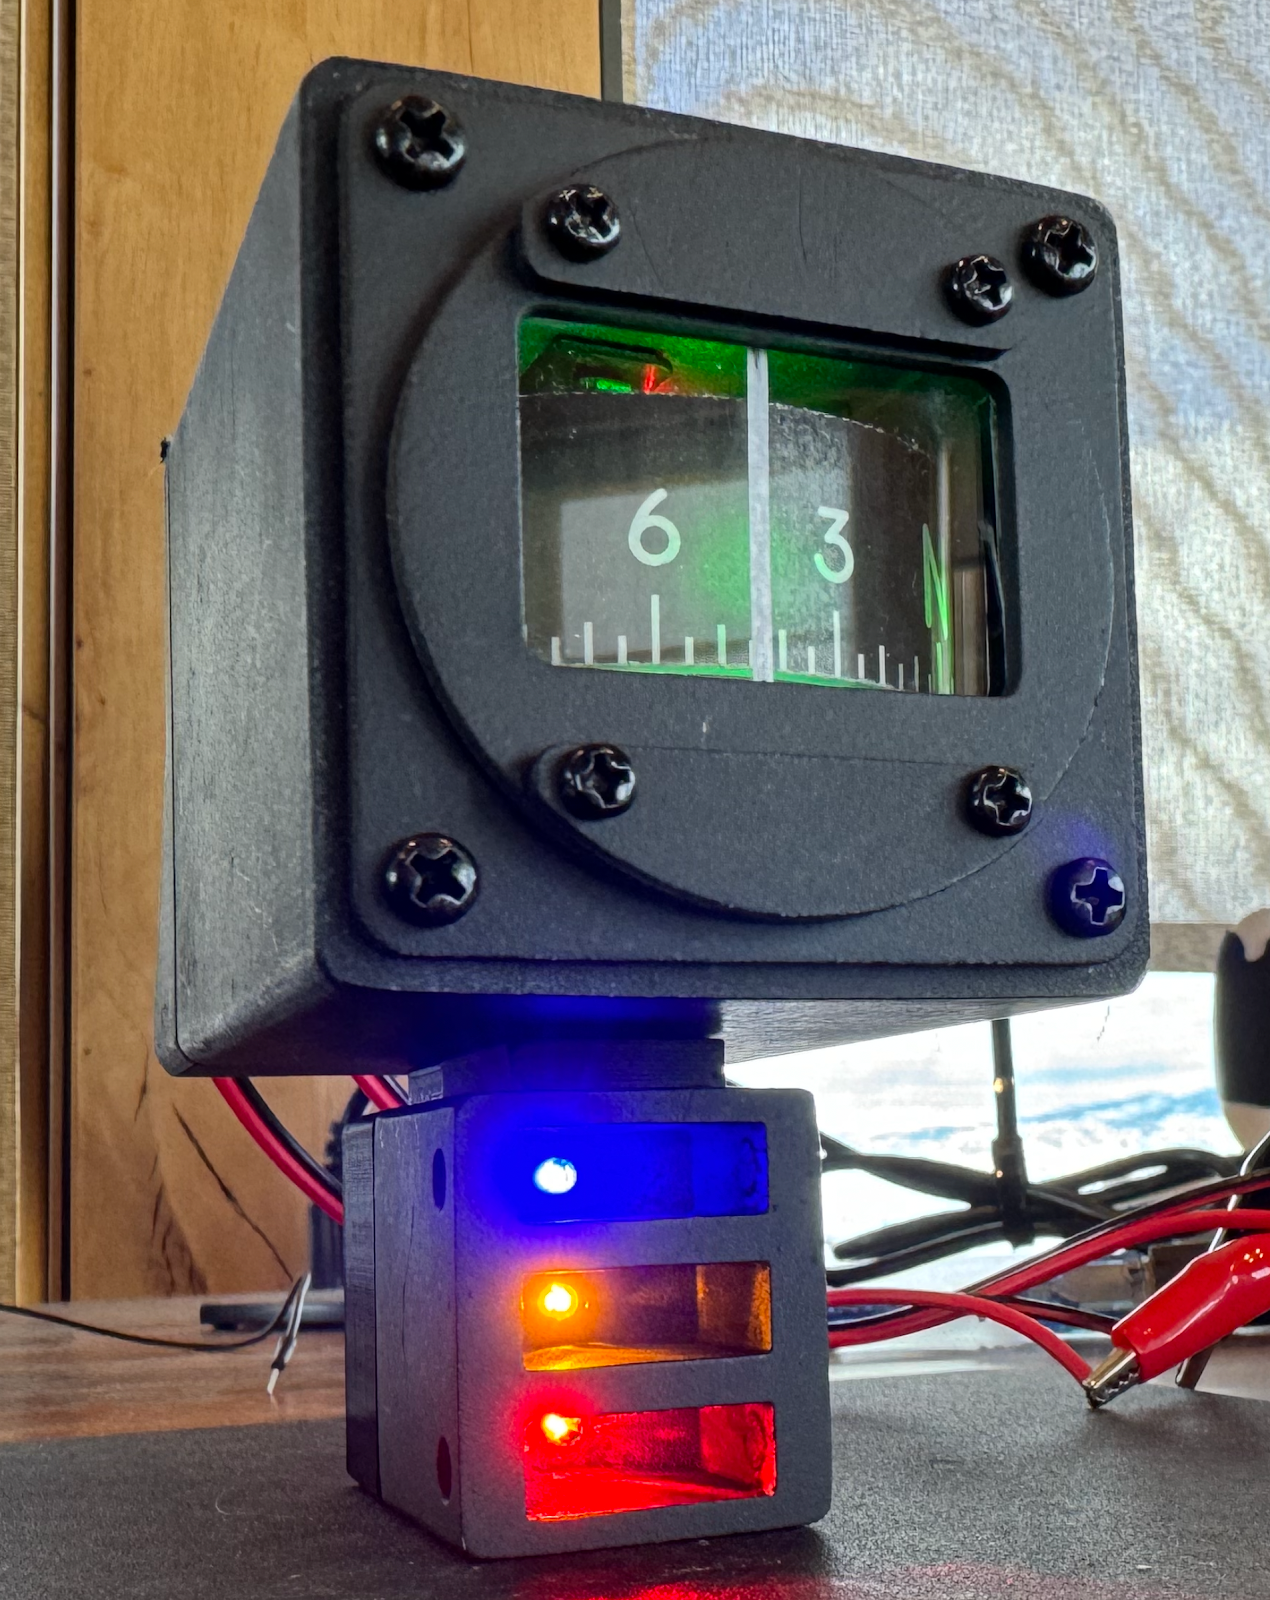
A10-C Standby Compass: Final Setup

Image
Got everything soldered together (after likely damaging one EasyDriver and moving to a backup) and squeezed it into the case.  At first I thought the compass wheel was much too high but then I realized the front bezel was installed upside down. Used an Exacto knife to cut a piece of acrylic for the front glass and put a small vertical sticker on it to act as the reference line.  Not super pretty but works ok until I can cut with a laser instead (maybe an xTool). Getting everything to fit was trickier than I expected, but it all worked out without too much rework required.  I used some 5.5mm x 2.1mm plugs for the 12v power plugs (tip/center was positive).   For the aerial refueling LEDs I used some more LEDs that have resistors built-in.  They are made for 12v so will likely bit a little dim since I am powering them off the digital out 5v pins from the Nano.  Don't have a way to make the lens for those yet so will wait to see if that is the case.  ...

A-10C Standby Compass - Hardware Wiring

 Components: Arduino Nano , no headers attached EasyDriver board to run stepper motor 2x 12V power circuits (for LEDs and motor power) - used computer power supply with ATX breakout board IR sensor X27 168 Stepper Motor 3 green LEDs with built-in resistor 3 LEDs for the Ready/Latch/Disconnect box (and resistors if not built in) 3D printed parts from The Warthog Project Wiring 3 green LEDs , in parallel -> power and ground to one 12V circuit Arduino Nano (10 connections, plus USB) D11 to IR Sensor "OUT" D3 to EasyDriver DIR D2 to EasyDriver STEP GND to IR sensor GND GND to EasyDriver control GND (by STEP) 5V PWR to IR Sensor VCC D6 , D7 , D8 and ICSP GND (from the 6-pin cluster) routed out of box to later power the 3 LEDs below this compass unit ("ready", "latch", "disconnect") IR Sensor (3 connections) VCC to Nano 5V GND to Nano GND OUT to Nano D9 Stepper Motor (open it to remove tiny plastic stop tab, for 360 motion - 4 connections) Coil 1/A...

A-10C Standby Compass: Basic Functions Working

Image
After getting the stepper motor to move yesterday I worked on the LEDs and getting the IR sensor into the mix today.  My LEDs are green ones that have the resistor built-in, and therefore are expected to be wired to my 12v power supply in parallel.  That generally went ok even with my sub-par soldering skills but there was very little room for things.  If I had made my own 3D print for the LED holder (or had the original 3D design files) I might have improved that a bit, but I made it work. Here's the code I used for this today . Things I learned while copying this awesome work : Be careful with how wires need to route before putting heat-shrink on them, that stuff doesn't bend well.  Also consider the type of wire in use: I switched to easy bending wire for the things I had to route around tight spots. If the motor spins the wrong way, swap the pins on ONE of the coils, A or B - or use the AccelStepper's setPinsInverted() function in the Arduino code to invert ...

Standby Compass: StepperTest

Image
Yesterday I finally received the EasyDriver stepper driver and the X27-168 steppers(no more AliExpress orders if I can help it - took weeks to arrive).   I opened up the motor and removed the tiny plastic tab that was keeping it from spinning 360.  I soldered headers on one of the EasyDrivers for prototyping and soldered some solid core wire to the little leads on the motor.   After wiring it all up on the breadboard I used this code to see it run. For the connections: you need to put one coil's wire pair on the A pins for the EasyDriver and the other coil's on the B pins.  There is no polarity so the A coil wires can go on plus or minus.  I put the 12v power on the M+ and GND pin pair.  Then these as well: // EasyDriver -> Nano stp -> 2 dir -> 3 MS1 -> 4 MS2 -> 5 EN   -> 6 GND (by step pin) -> GND Do not connect/disconnect the motor when power is applied . Power is constantly flowing to keep motor still and changin...

More Standby Compass work

Image
 Did the filling, sanding and painting of the box today.   Got the computer power supply breakout board working and tested it by powering 50 green LEDs with 12v.  These LEDs have a resistor built-in so I ran them all in parallel.  They pulled about 13 mA at steady state, which is well under the typical 20 mA limit.  They were super bright. Played with an Arduino sim here - using wrong driver board - to try to think though the wiring.

Servo responding the fuel gauge changes in DCS

Got a servo SG90 working, just powered off arduino since only running one - just needs one digital pin.  Seems to do just fine! //============ #include <Servo.h> #define DCSBIOS_DEFAULT_SERIAL #include "DcsBios.h" DcsBios::ServoOutput fuelQtyL(0x10ca, 8, 544, 2400); void setup() {   DcsBios::setup(); } void loop() {   DcsBios::loop(); }

Standby Compass - first steps

Started on a standby compass today.  Printed out the parts from TWP (Warthog Proj) and ordered electronics he mentioned in the video.  Did the same finishing of the 3d prints as he did - started the sanding.   Mounted the electric dewalt sander in the big vice upside down to act as a bench sander.  Sanded and rinsed them in water to remove the dust.  Will use spray filler and then paint to get them looking better. Used some of the black M3 screws to mount some of the parts.   Learned a bit about backlighting, TWP has some good info on that.   Ordered computer PSU breakout boards to get to power coming off that.  Also ordered 2 PWM LED dimmers to connect to that breakout.   3d prints: I like the organic/tree supports, but make sure you orient the part such that the top of the tree is minimal cross section.  If the tree ends up "spreading out" at the top it is near impossible to break loose - you want a minimal connect...

LCD, Potentiometer, LED, Rotary Encoder all working with DCS-BIOS

Image
 Learned a lot today trying to get a pot going:  DO NOT have Serial.begin() in the hardware code as that seems to disrupt the DCS BIOS comms DO NOT have a delay in the loop func - DCS BIOS can't do its thing When you run multiple-com-ports.cmd watch for errors - if you have the IDE connected to the device the script will fail to connect since it is tied up - it will errors with a message about the device (but the com number will be 1 lowered that what you put in the script itself, must be zero-indexed) Wire switches from GROUND to a digital pin, not from +5v YOU CAN stop the bios cmd, deploy new code via IDE, and then restart BIOS while the game is running, so that is helpful The BORT tool is called ...setup.exe - that is the binary itself, not a setup program BORT does not appear to update all its values shown on-demand, seems to not be 2-way comms with BIOS - though SOME vals do work 2-way The rotary encoder I was using would occasionally skip input or put out a double inp...

Heated Inserts for 3D print screws

Image
 Worked on inserting magnets and heat inserts for screws today (into 3D prints, for better strength). I paused the print for the magnet insert and let them have 2 layers printed on top after. The Prusa XL needed help clearing the nozzle upon resume, it did not do that itself. I sized the hole purely based on the magnet size and that was fine.  The magnets were fairly weak with the 2 layers on top so plan accordingly in the future. For the brass heat inserts: they worked with the dimensions I measured off the inserts - however, I needed to countersink the insert holes (made a surround that was 1 mm more in DIAMETER, 1 mm deep - should have used 2mm for both those offsets).  However the extra plastic that came out the top was easy to sand away.  Some sort of drill press setup for the soldering iron would have helped them go in perfectly straight. I used my older soldering iron ( basic Weller ) with new tips that are sized for different heat insert sizes.   ...

First time trying DCS-BIOS to talk to DCS sim

Used the warthog proj video to learn how to use DCS-BIOS to control the switches.  Worked on the first try! Found the Arduino com port in Device Manager under "Ports..."  Updated the "C:\Users\vecto\Saved Games\dcs-bios-master\Programs" file multiple-com-ports (to update the com ports for my Arduinos) and then let it run - the first time it unzipped socat for me, and then I re-ran the cmd to make sure it worked.  The cmd window did not have clear messages but it was working Used Bort as well, from the same org in github (not the other fork) Don't download the code, find the latest exe in there to grab It needs to know where the json dir is within DCSBios - I had that in Saved Games so pointed it there https://www.youtube.com/watch?v=LsAnP6H9BMU used the dcs-bios and arduino lib from that same shunkworks org - did not use FlightPanels thing Based on warthog's notes, I plan to use joystick style coding for all dumb switches so they can work in other apps and ...

First tiny steps toward building a simpit

I have wanted to build my own flight sim for decades now and have finally started on the process. Followed this video to get my first Arduino pro micro working as a simple joystick with buttons in windows Did a manual install of dcs-input-command-injector-master since I could not get OvGME to work Was able to get a 2 position and 3 position switch working for the A10c2

Hiking to Rocky Peak in Steamboat Springs

Image
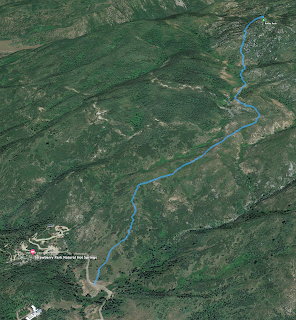
Did a great hike today that is not in the commonly used hiking apps.  The trail is generally easy to see, though there were times that we lost it.  There are plenty of bushes and undergrowth draping over the trail, so bring long pants. Leg gaiters might be nice too, just to protect your legs a bit. Many parts of the trail are actually drainage ditches.   Here's a KML file from our trip down - we followed the trail much better after learning what to avoid on the way up. We went right after a thunderstorm had come through the previous night, so got pretty soaked due to the plants being wet.   Found the path to the top and saw 2 moose along the way - gorgeous views for the entire trek.  2 miles to get to the top from the parking near the hot springs with about 1800' of elevation gain.  Certainly not a beginner's hiking trail, but not a problem for those with some experience (and lungs that are used to the altitude).

Not Posting Much!

Image
 I haven't posted here in a few years, but have managed to keep going on the YouTube side.  Check out all my latest videos over there .   Since I last posted I have crossed 1700 hours with the majority of my recent time being in the TBM.  It has been a fantastic airplane for our travels, both personal and business.  It's an airplane that I like and appreciate more every time I get to fly it!  We'e started using it to go to more places, including the mountains, and being able to fly high with a strong, reliable engine has greatly reduced stress levels.  That, plus getting more experience under my belt.  K has been terrific as my co-pilot - she does pretty much everything but land it for me. :)

First solo in the TBM 900

Image
I went through the SimCom training, which was a ton of fun, and reached the mentor hours required by my insurance, so it was SOLO time!  I did a quick lap in the local area and captured parts of it on video.

TBM time

Image
Today I took delivery of a TBM 900. It's slightly used, with 280 hours of time on it, but by all appearances looks brand new.  It's billed as the fastest single engine turbo-prop and with a typical cruise speed in the area of 325kts, I believe it. A few things drew me to this particular model. I was able to get a demo ride in a similar one late last year, a 930 model, and found I liked it much more than I expected to.  It's powered by the well-proven PT6 turboprop engine that offers huge amounts of horsepower (850 in this install) coupled to relatively quiet and very reliable operation. Coming from a Cirrus SR22, this airplane is basically 2x in all respects - twice the speed, twice the altitude, twice the load carrying capability, and darn near twice the range on full tanks.  The costs involved are more than 2x, but that is life in aviation. Since moving to Texas, our family of four has had a desire to fly back to SC and GA more easily, and more quickly. ...

A bit about my Granddad

Image
A few articles about my Grandad, Harry Miller Sr.  He was a Navy pilot that flew in WWII. ---- Springstein Plant  ENSIGN HARRY MILLER WRITES OF RESCUING AIRPLANE CREW AT SEA  Likely ~Early 1943 We've mentioned Springstein's red-haired hero, Ensign Harry Miller, several time in The Springs Bulletin and a recent letter of his relates a very interesting experience:  "We left Ascension on the way to South America and had been out about an hour and a half when we picked up a faint SOS. We knew what it was — A-20 was lost the day before and was ditched when it ran out of gas. They didn't know where to look for the crew though. Anyway, we took a bearing on the radio and headed on the course; in about 20 minutes we saw a white balloon and there they were — two men in a rubber life raft. There is a little radio in those boats and you fasten an antenna to a little white balloon filled with gas and it holds the wire up. The radio will transmit for two h...

Bose A20 headset

Image
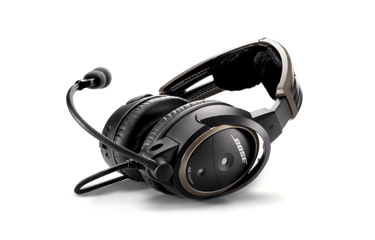
I recently purchase a Bose A20 headset, the newer model with bluetooth audio support.  This was after seeing it advertised many times over on FlightChops and  steveo1kinevo (adverts work, people!). I've been using a Lightspeed Zulu 2 for the last couple of years, so I was curious to compare it to the Bose.  I like the Bose much better.  Both have nice bluetooth audio setups, with volume controls on the headset cable and a mute vs mix mode for radio and music combinations.  The Bose was trivial to pair to my phone, as it booted up in pairing mode right away. The music quality was at least 10x better with the Bose.  It has actual bass, and much more dynamic range.  The zulu 2 always made music sound kind of distant to my ears. I also think the Bose is better at noise canceling by a small, but noticeable amount. The other win for the Bose is in comfort.  The clamping force is less on your skull and the ear cups are less bulky, meani...

Citation Mustang Flight

Image
Well, it's been a year since I posted an update here. Since then I have moved to TX and added maybe 80 hours of flight time to my (ForeFlight) logbook in the Cirrus. Not taking many long trips now that I live closer to fellow ForeFlight folks, but I have had a few good trips back and forth to Houston and my total flight hours is nearing 1,000. Our company has grown considerably over these last 12 months (we're around 80 people now) and being able to chat in person with more folks has been helpful. I got the chance to fly a PC-12 a few months ago and enjoyed it. That plane is especially enjoyable in the back cabin, as there is loads of room. It is a nice balance of speed, comfort, and endurance. I spent a fair bit of time in a Piper Meridian too, and enjoyed it.  It's not the fastest or roomiest Jet-A powered plane, but is quite nice for the price. Last week however, I got the chance to fly a Citation Mustang on two flights, start to finish. While I have an hour or...

Moved to Austin

It's been a long time since I updated my blog, but we've been quite busy. We recently moved to Austin and have been settled here for about a month. Getting out here was interesting as it was the first time we've moved such a distance.  We ended up splitting it across a three day period, after having moved out of the old house (a feat in and of itself). Our family of 4 piled into the SUV, hooked up a trailer, and headed west. We stopped after ~6 hours of driving each day to sleep in a hotel. It worked out pretty well, but we were really happy to have that behind us once we were finally in the new house.  To get the Cirrus out here I enlisted the help of one of my instructors. He spent a morning getting it out to KGTU in Georgetown and I met him there to give him a lift to the commercial airport. I managed to find a community hangar to put the plane in so that it could stay out of the weather.